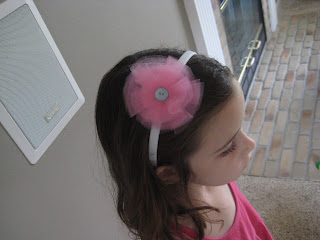
For my first attempt, I wanted to make something for my five year old daughter, so I thought I would try a hot pink flower and attach it to a headband. Here are the supplies I used:
10 discs of tulle cut into large circles (4 inches across)
10 discs of tulle cut into smaller circles (3 inches across)
2 round pieces of white felt (1.5-2 inches across) **Note** It is probably best to use a color of felt that closely matches your tulle color so that it isn't as noticeable under the tulle flower when finished.
Decorative beads or a button to glue into the middle
Headband (we already had one wrapped in white ribbon)
Hot glue gun
It's important to note that these tulle pieces need not be exactly circular. In fact, to save cutting time, I folded my tulle over and over and just cut out a big stack of 10 circles free hand all at once.
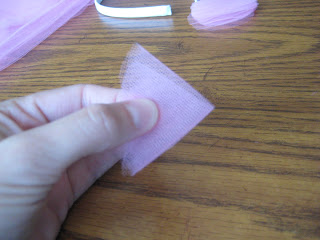
Starting with the larger tulle circles, I placed two one on top of the other and folded the disc in half like so.
Then I folded that in half again until I got a wedge shaped thingy-ma-jobbie like this:
Then I put a dab of glue in the inside corner where it comes to a point and pressed the point into the middle of one of the discs of white felt.
I repeated the same process for the remaining 8 large tulle circles, creating each "petal" using two layers of tulle and slightly over lapping them when gluing them down. The end result is a base layer of five petals that completely cover the white felt circle.
For the top layer, I did the exact same thing with the 10 smaller tulle circles. I wasn't too tidy with the glue considering that tulle fabric has holes all over it, so I was constantly getting gluey fingers when I'd try and press the petals down. The clump of glue left in the middle after I finished gluing all of the petals down was a little too substantial for the dainty pearl beads I had a mind to stick into the center, so instead I covered it up with a turquoise button to make it look a little more polished.
So now I had a tulle flower glued to a white felt circle. All that was left to be done was to sandwich a head band between that piece of felt and the other piece of felt, glue liberally....
...and VOILA!
Total time, about 15 minutes!
Edited to add: After viewing a few more tutorials online, most people are sewing down the folded points of the tulle onto the felt circle to secure it. This would take a little more time, but prevent the gluey mess. I'm going to try that next time!


2 comments:
I love these!!!
I tried it your way and though there was a gooey mess, it turned out quite nicely. I will try the sewing next time as well. Thank you!!!
Post a Comment